Rediscover Snack Time: The Ultimate Guide to Homemade Vegan Gluten-Free Granola Bars
In our fast-paced lives, convenience often trumps nutritional value when it comes to snacking. Many of us, myself included, have fallen prey to the allure of store-bought granola bars – those seemingly healthy, on-the-go options that promise energy and satisfaction. Brands like Z-Bars, Clif Bars, and Quaker Chewy Bars have become staples in lunchboxes and desk drawers, offering a quick fix for hunger pangs. But peel back the shiny wrapper, and you often find a list of ingredients that raises an eyebrow: refined sugars, artificial flavors, and a surprising lack of real, satiating protein and fiber. It's a classic dilemma: you want something quick, tasty, and genuinely good for you, but the supermarket aisles often disappoint.
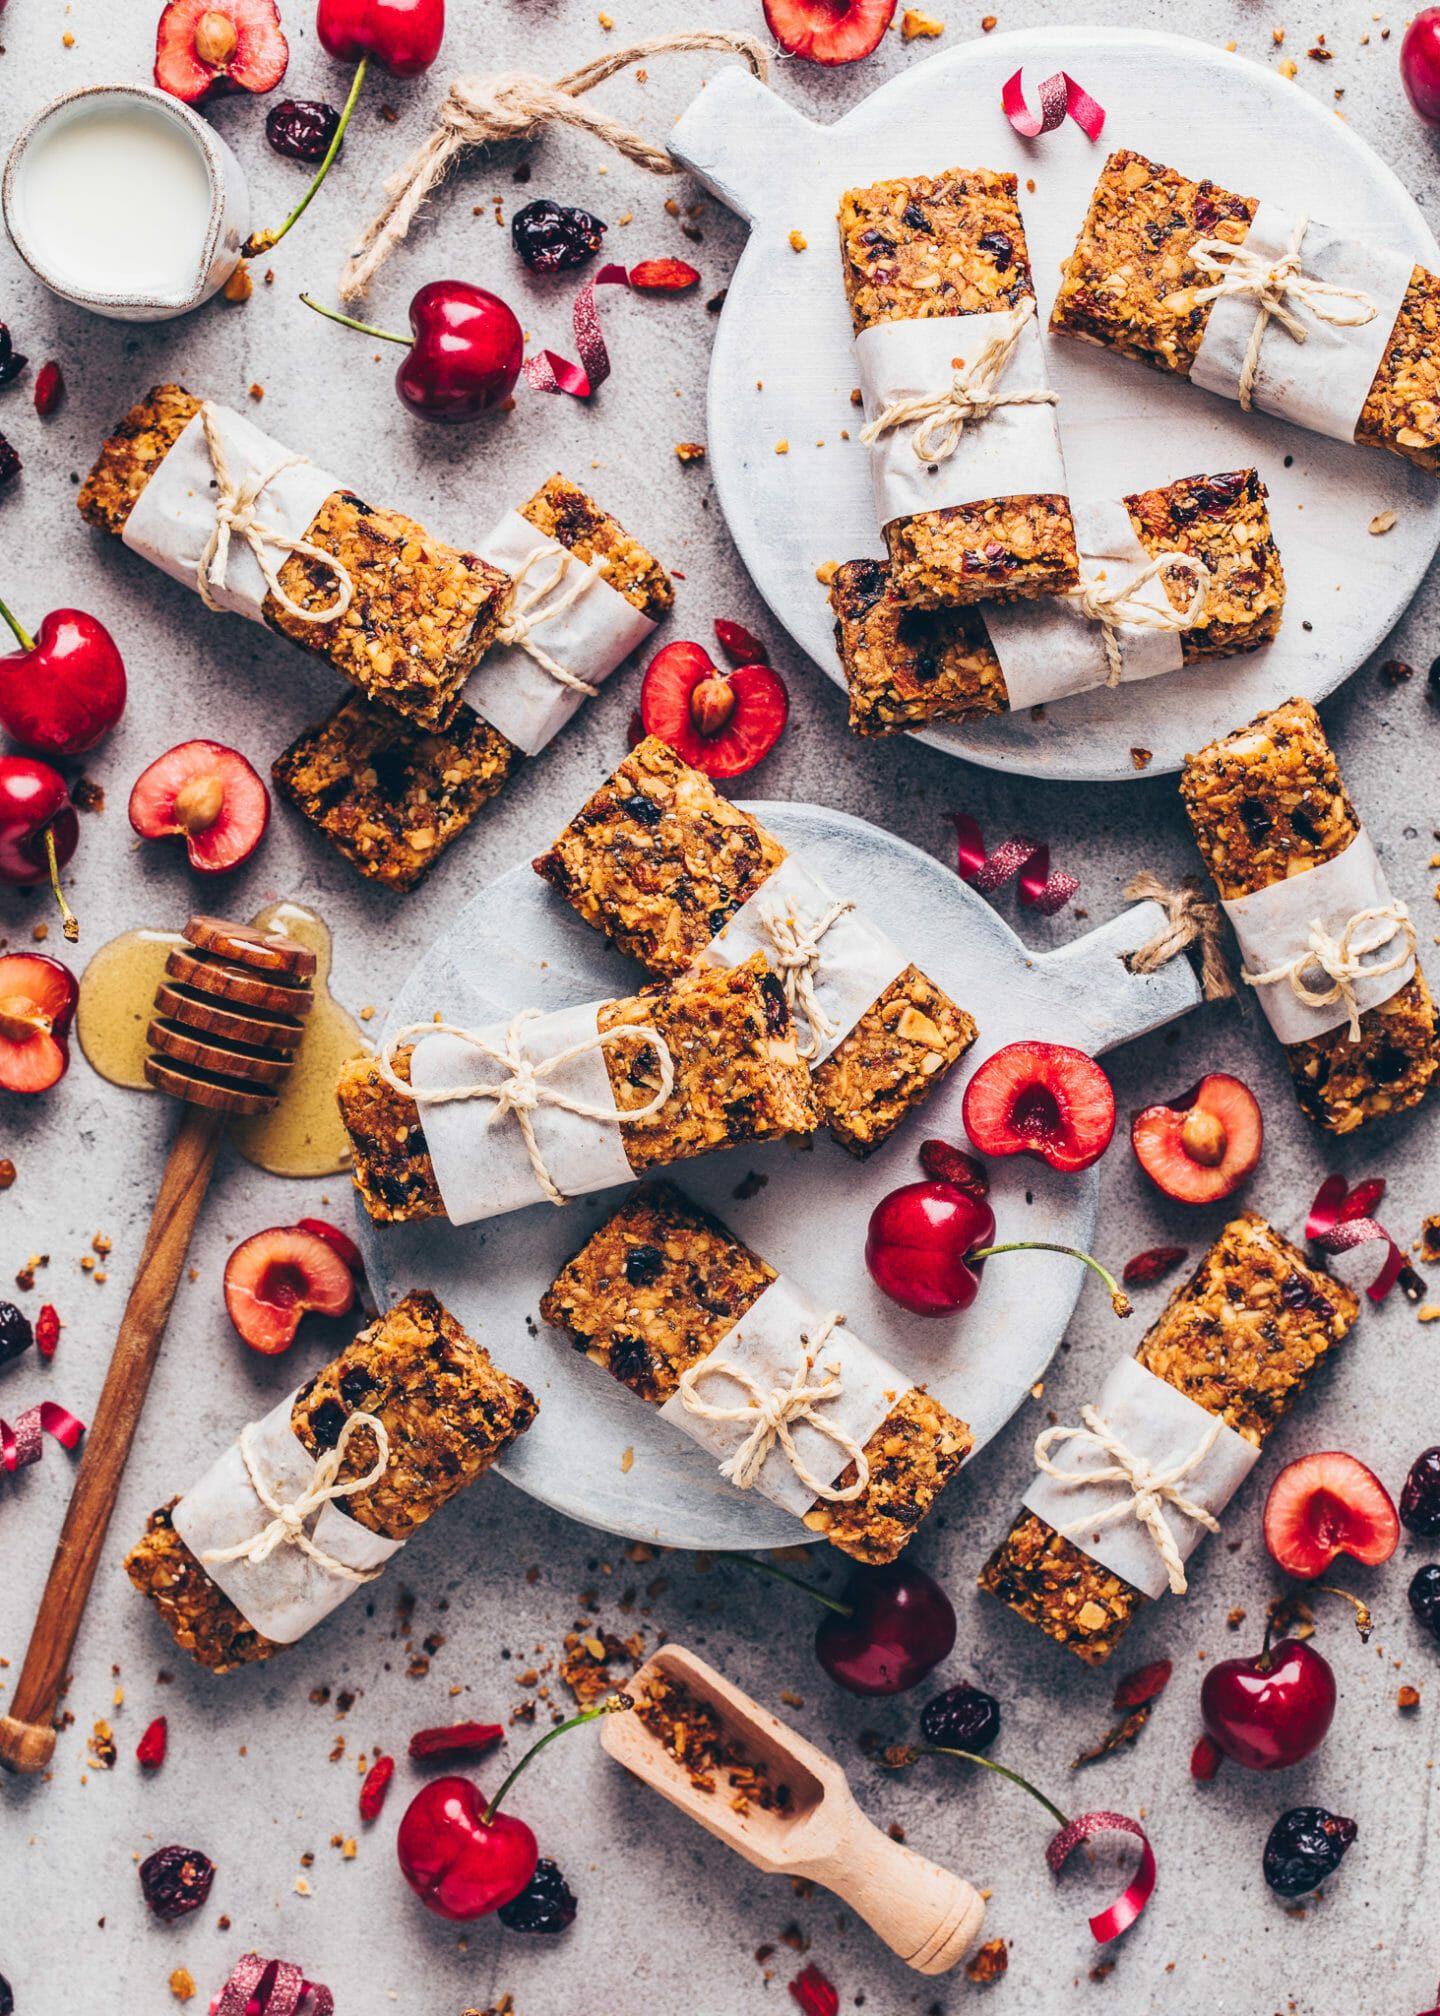
The good news? You don't have to compromise! Imagine a snack that’s not only incredibly delicious and convenient but also packed with wholesome ingredients, free from gluten and animal products, and so easy to make you'll wonder why you ever bought a bar again. Enter the world of homemade no bake granola bars gluten free vegan – a game-changer for anyone seeking a healthier, more fulfilling snack experience. These bars are a revelation, promising the beloved chewy texture and delightful sweetness of your childhood favorites, but with the added benefits of being nutrient-dense and fully customizable to your taste and dietary needs.
Why Homemade No-Bake Granola Bars Are a Game Changer
The decision to make your own snacks, especially something as versatile as no bake granola bars gluten free vegan, comes with a multitude of benefits that extend far beyond simply saving money. It's about taking control of what you eat, fueling your body with intention, and discovering the joy of creating something truly nourishing.
- Unmatched Nutritional Value: Unlike many store-bought options that are low in protein and fiber (leaving you hungry shortly after), homemade bars can be crafted to be incredibly filling. By using whole food ingredients like rolled oats, natural nut butters, and seeds, you can easily pack in 9g or more of protein per bar. This means sustained energy and genuine satiety, helping you avoid those mid-afternoon energy crashes and the temptation of less healthy choices. For more insights into creating satisfying, protein-rich snacks, explore Protein-Rich No-Bake Granola Bars: Stay Full, Ditch Store-Bought.
- Complete Ingredient Control: Say goodbye to questionable additives, high-fructose corn syrup, and unhealthy oils. When you make your own vegan gluten-free granola bars, you choose every single ingredient. This is particularly vital for those with allergies or specific dietary preferences, ensuring peace of mind with every bite.
- Effortless & Quick Preparation: The beauty of "no-bake" is in its simplicity. Many recipes require just 5 main ingredients and can be whipped up in under 5 minutes of active prep time. No oven, no complex steps – just a mixing bowl, a pan, and a refrigerator to firm things up. This makes them perfect for busy individuals and families.
- Endless Customization: This is where the magic truly happens! From different nuts and seeds to various dried fruits and spices, the possibilities are virtually limitless. You can tailor each batch to suit individual preferences, making sure everyone in the household gets exactly what they crave.
- Dietary Inclusivity: Being naturally vegan and gluten-free means these bars are suitable for a wide range of diets, making them perfect for potlucks, lunchboxes, or sharing with friends who have dietary restrictions.
The Simple Science of No-Bake: Crafting Your Perfect Base
The foundation of any great no bake granola bar gluten free vegan recipe lies in its simplicity and the clever combination of just a few core ingredients. You'll be amazed at how easily these come together to form a chewy, delicious, and nutrient-dense base.
Essential Ingredients for Your Granola Bar Base:
- Rolled Oats: These are the star! Ensure you use certified gluten-free rolled oats if you have celiac disease or gluten sensitivity. They provide the bulk, fiber, and that signature chewy texture. Quick oats can also work, but rolled oats offer a heartier chew.
- Nut or Seed Butter: This acts as the primary binder and provides healthy fats and protein. Peanut butter is a classic choice, but almond butter, cashew butter, or even sunflower seed butter (for a nut-free option) work beautifully. Using a natural, unsweetened variety gives you more control over the overall sweetness.
- Liquid Sweetener: Maple syrup is a popular choice, offering a distinct flavor and acting as a fantastic binder. Agave nectar or brown rice syrup are also excellent alternatives. This helps bind the oats and adds the perfect touch of sweetness.
- A Pinch of Salt: Don't underestimate the power of salt! It balances the sweetness and enhances all the other flavors.
- Optional: Warming Spices: A dash of cinnamon or a blend like pumpkin pie spice can elevate the flavor profile significantly, adding warmth and depth.
The Easy "How-To":
The process truly is as simple as it sounds. You'll need a large mixing bowl and a pan (a square 8x8 or 9x9 inch pan works great) lined with parchment paper for easy removal.
- Melt & Mix the Wet Ingredients: Start by gently heating your nut/seed butter and liquid sweetener together. A quick blast in the microwave (30-60 seconds) or a warm saucepan on the stove will make them more liquidy and easier to combine evenly. This step is particularly helpful if you're using a natural nut butter that's been refrigerated.
- Add Flavor Enhancers: Stir in your salt and any desired spices (like cinnamon) into the warm wet mixture. This ensures they're evenly distributed before the oats go in.
- Combine with Oats: Pour the wet mixture over your rolled oats in the large mixing bowl. Stir thoroughly until all the oats are well coated. This is also the stage where you'd incorporate your chosen mix-ins.
- Press & Chill: Transfer the mixture to your parchment-lined pan. This is a crucial step for bar integrity: press the mixture down very firmly and evenly across the pan. You can use the back of a spoon, a spatula, or even another piece of parchment paper to get it really compact. The firmer you press, the less likely your bars are to crumble.
- Refrigerate: Pop the pan into the refrigerator for at least one hour (or ideally, two) to allow the bars to firm up completely. This is essential for clean slicing and perfect texture. Once firm, lift the parchment paper to remove the slab, and slice into your desired bar size.
And just like that, you have a batch of delicious, healthy, vegan gluten-free no-bake granola bars ready to fuel your week! If you're looking for even more quick prep inspiration, check out our guide on Minute No-Bake Granola Bars: Vegan, Gluten-Free & Protein-Packed.
Unleash Your Creativity: Endless Mix-In Ideas
This is where your homemade vegan gluten-free granola bars truly become your own masterpiece. The beauty of these bars lies in their adaptability. Think of your base as a blank canvas, ready to be adorned with whatever wholesome, tasty additions you desire. The key is to "toss in whatever mix-ins were within arm's reach," as one inspiring cook put it, knowing that almost anything works beautifully.
Sweet & Decadent Additions:
- Chocolate: Mini chocolate chips are often recommended because they distribute better and give a more consistent melt-in-your-mouth experience throughout the bar. However, feel free to experiment with chopped dark chocolate (ensure it's vegan if needed) or even cacao nibs for a less sweet, antioxidant-rich crunch.
- Coconut: Shredded or flaked coconut adds a lovely texture and tropical flavor. Toasting it lightly before adding can enhance its aroma and crunch.
- Vanilla/Almond Extract: A teaspoon of pure vanilla extract or almond extract can significantly boost the overall flavor profile, adding a bakery-like aroma.
Nutty & Crunchy Enhancements:
- Chopped Nuts: Almonds (slivered or chopped), walnuts, pecans, cashews, or pistachios add healthy fats, protein, and a satisfying crunch. Lightly toasting them beforehand can bring out their natural flavors.
- Seeds: Boost the nutritional punch with a variety of seeds. Chia seeds and hemp seeds are fantastic for omega-3s and protein. Flax seeds, pumpkin seeds (pepitas), and sunflower seeds contribute healthy fats, fiber, and a delightful texture.
- Puffed Cereal: For an extra airy crunch, consider adding a handful of gluten-free puffed rice cereal or quinoa crisps.
Fruity & Chewy Delights:
- Dried Fruits: The possibilities are vast! Classic raisins and cranberries add a tart-sweet chew. Chopped dates, apricots, figs, or cherries provide a richer, more substantial chewiness and natural sweetness. Always chop larger dried fruits to ensure they're evenly distributed throughout the bars.
- Citrus Zest: A little lemon or orange zest can add a bright, fresh note, cutting through the richness of the nuts and oats.
Spicy & Aromatic Touches:
- Cinnamon: Always a winner, adding warmth and sweetness.
- Nutmeg, Cardamom, Ginger: These spices can add a gourmet touch, especially when combined with certain dried fruits or chocolate. Think ginger with dried cranberries, or cardamom with pistachios.
- Pumpkin Pie Spice: Perfect for a seasonal twist, especially in the fall.
Pro Tip: Don't be afraid to experiment with combinations! A classic trio of dark chocolate, cranberries, and walnuts is always a hit. Or try a more adventurous mix of dried apricots, pistachios, and a hint of cardamom. The beauty of these homemade no bake granola bars gluten free vegan is that they are incredibly forgiving.
Tips for Granola Bar Perfection & Smart Storage
While making these bars is straightforward, a few tips can help you achieve consistent perfection and ensure they last as long as you need them to.
- Press, Press, Press! We can't emphasize this enough. The more firmly you press the mixture into the pan, the better your bars will hold together. This is the secret to non-crumbly bars.
- Sharp, Warm Knife for Slicing: Once fully chilled, use a sharp knife that has been warmed slightly under hot water (and then dried) to make clean cuts. This helps prevent sticking and crumbling.
- Chill Time is Crucial: Resist the urge to cut too soon! Adequate chilling time is essential for the bars to firm up properly and hold their shape.
- Customizing Sweetness: Taste your mixture before pressing. If your nut butter is unsweetened, you might prefer a little more maple syrup. If it's a sweeter variety, you might need less.
- Storage Savvy: Store your no bake granola bars gluten free vegan in an airtight container in the refrigerator for up to a week. For longer storage, individually wrap them in parchment paper or plastic wrap and freeze for up to a month. Thaw at room temperature for a quick snack, or enjoy them straight from the freezer for a different texture.
- Nut-Free Options: If allergies are a concern, swap peanut butter for sunflower seed butter and ensure all your mix-ins (like seeds) are truly nut-free.
Embrace Your Inner Granola Bar Artisan
Making your own homemade vegan gluten-free granola bars isn't just about crafting a snack; it's about embracing a healthier, more intentional lifestyle. From the satisfaction of knowing exactly what goes into your food to the sheer delight of a perfectly chewy, flavorful bite, these no-bake wonders offer an unparalleled snacking experience. They’re a testament to how simple, wholesome ingredients can come together to create something truly extraordinary – and infinitely better than anything you’d find in a box. So, gather your oats, unleash your creativity with those endless mix-in possibilities, and get ready to revolutionize your snack game. Your taste buds, and your body, will thank you!
